
Cleanvoice AI REST API
Welcome to the Cleanvoice AI REST API documentation. This API provides direct access to our audio processing capabilities with maximum flexibility and control.
Base URL
https://api.cleanvoice.ai/v1
Quick Navigation
- New to our API? → Getting Started
- Ready to code? → Quick Start Guide
- Need authentication? → API Keys & Auth
- Full API reference? → API Reference
Introduction
Base url
https://api.cleanvoice.ai/v2
https://api.cleanvoice.ai/v2
https://api.cleanvoice.ai/v2
https://api.cleanvoice.ai/v2
Welcome to the Cleanvoice API 👋
With this API you can automatically submit files to be edited by Cleanvoice, access existing edits and export them to various formats.
This is a REST API that uses predictable resource names and verbs. Our API is versioned where breaking changes are released as incremental versions. We'll try our best not to release versions too often, and to reasonably support legacy versions.
Workflow Integrations
Try our API Playground:
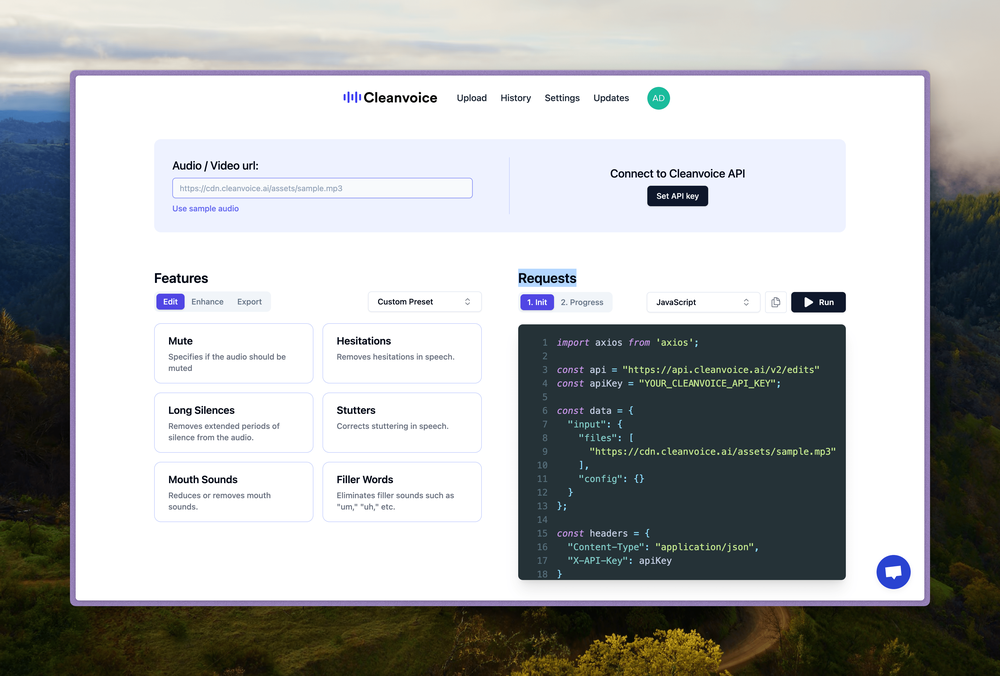
https://app.cleanvoice.ai/playground/
Click here if you want access to the swagger docs
If you have any questions, please write to us at support@cleanvoice.ai. We'd love to hear from you!
— Cleanvoice team
Quick Start Guide
Get up and running in 5 minutes
# 1. Get your API key from the dashboard
# 2. Upload your first file
curl -X POST "https://api.cleanvoice.ai/v2/uploads" \
  -H "X-API-Key: **your_api_key_here**" \
  -F "file=@your_audio_file.mp3" \
  -F "name=My First Upload"

# 3. Check the processing status
curl "https://api.cleanvoice.ai/v2/uploads/{upload_id}" \
  -H "X-API-Key: **your_api_key_here**"
import requests

# 1. Set up your API key
api_key = "**your_api_key_here**"
headers = {"X-API-Key": api_key}

# 2. Upload your first file
with open("your_audio_file.mp3", "rb") as f:
    files = {"file": f}
    data = {"name": "My First Upload"}
    response = requests.post(
        "https://api.cleanvoice.ai/v2/uploads",
        headers=headers,
        files=files,
        data=data
    )

upload_id = response.json()["id"]

# 3. Check processing status
status = requests.get(
    f"https://api.cleanvoice.ai/v2/uploads/{upload_id}",
    headers=headers
)
import axios from 'axios';
import FormData from 'form-data';
import fs from 'fs';

// 1. Set up your API key
const apiKey = "**your_api_key_here**";
const headers = {"X-API-Key": apiKey};

// 2. Upload your first file
const formData = new FormData();
formData.append('file', fs.createReadStream('your_audio_file.mp3'));
formData.append('name', 'My First Upload');

const uploadResponse = await axios.post(
    'https://api.cleanvoice.ai/v2/uploads',
    formData,
    { headers: {...headers, ...formData.getHeaders()} }
);

const uploadId = uploadResponse.data.id;

// 3. Check processing status
const statusResponse = await axios.get(
    `https://api.cleanvoice.ai/v2/uploads/${uploadId}`,
    { headers }
);
Welcome to Cleanvoice! This quick start will get you from zero to your first processed audio file in just a few minutes.
What You'll Learn
- How to get your API key
- How to upload your first audio file
- How to check processing status
- How to download your cleaned audio
Prerequisites
Before you begin, you'll need:
- A Cleanvoice account (sign up here)
- An audio file to process (MP3, WAV, or M4A)
- Basic familiarity with REST APIs
Step 1: Get Your API Key
- Log in to your Cleanvoice dashboard
- Navigate to Settings
- Copy your API key from the API section
Step 2: Upload Your First File
Use the code examples on the right to upload an audio file. The API will return an upload ID that you'll use to track the processing.
Step 3: Monitor Processing
Audio processing typically takes 1-3 minutes depending on file length. Use the upload ID to check the status.
Step 4: Download Your Cleaned Audio
Once processing is complete (status: "completed"), you can download the cleaned audio using the export endpoints.
Next Steps
🎉 Congratulations! You've successfully processed your first audio file.
Continue your journey:
- Complete Tutorial - Detailed walkthrough with examples
- Processing Options - Learn about different cleaning options
- Export Formats - Download in various formats
- API Reference - Complete endpoint documentation
Authentication
To authorize, use this code:
# With shell, you can just pass the correct header with each request
curl "https://api.cleanvoice.ai/v2/account" \
  -H "X-API-Key: **your_api_key_here**"
import requests

url = 'https://api.cleanvoice.ai/v2/account'
headers = {'X-API-Key': '**your_api_key_here**'}
requests.get(url, headers=headers)
require 'net/http'
require 'uri'

uri = URI.parse('https://api.cleanvoice.ai/v2/account')
header = { 'X-API-Key': '**your_api_key_here**' }

http = Net::HTTP.new(uri.host, uri.port)
http.use_ssl = true
request = Net::HTTP::Get.new(uri.request_uri, header)
response = http.request(request)
import axios from 'axios';

const url = 'https://api.cleanvoice.ai/v2/account';
const headers = {'X-API-Key': '**your_api_key_here**'};

axios.get(url, { headers })
    .then((response) => {
        console.log(response.data);
    })
    .catch((error) => {
        console.log(error);
    });
Make sure to replace
**your_api_key_here**with your API key.
Cleanvoice uses API keys to allow access to the API. You can get your API key by logging in and going to settings
Cleanvoice expects the API key to be included in all API requests to the server in a header that looks like the following:
X-Api-Key: **your_api_key_here**
Tutorial: Your First Upload
Complete walkthrough with real examples
# Step 1: Test your API key
curl "https://api.cleanvoice.ai/v2/account" \
  -H "X-API-Key: **your_api_key_here**"

# Step 2: Upload with specific options
curl -X POST "https://api.cleanvoice.ai/v2/uploads" \
  -H "X-API-Key: **your_api_key_here**" \
  -F "file=@podcast-episode-1.mp3" \
  -F "name=Podcast Episode 1" \
  -F "remove_filler_words=true" \
  -F "remove_silence=true" \
  -F "enhance_speech=true"

# Step 3: Monitor progress
curl "https://api.cleanvoice.ai/v2/uploads/12345" \
  -H "X-API-Key: **your_api_key_here**"

# Step 4: Download when ready
curl "https://api.cleanvoice.ai/v2/uploads/12345/export" \
  -H "X-API-Key: **your_api_key_here**" \
  -H "Accept: audio/mpeg" \
  -o "cleaned-podcast-episode-1.mp3"
import requests
import time
import json

# Configuration
API_KEY = "**your_api_key_here**"
BASE_URL = "https://api.cleanvoice.ai/v2"
headers = {"X-API-Key": API_KEY}

# Step 1: Verify API key
print("🔑 Verifying API key...")
account_response = requests.get(f"{BASE_URL}/account", headers=headers)
if account_response.status_code == 200:
    print("✅ API key valid")
    print(f"Account: {account_response.json()['email']}")
else:
    print("❌ Invalid API key")
    exit(1)

# Step 2: Upload file with options
print("\n📁 Uploading file...")
with open("podcast-episode-1.mp3", "rb") as audio_file:
    files = {"file": audio_file}
    data = {
        "name": "Podcast Episode 1",
        "remove_filler_words": True,
        "remove_silence": True,
        "enhance_speech": True
    }

    upload_response = requests.post(
        f"{BASE_URL}/uploads",
        headers=headers,
        files=files,
        data=data
    )

if upload_response.status_code == 201:
    upload_data = upload_response.json()
    upload_id = upload_data["id"]
    print(f"✅ Upload successful! ID: {upload_id}")
else:
    print(f"❌ Upload failed: {upload_response.text}")
    exit(1)

# Step 3: Monitor processing
print("\n⏳ Processing audio...")
while True:
    status_response = requests.get(
        f"{BASE_URL}/uploads/{upload_id}",
        headers=headers
    )

    if status_response.status_code == 200:
        status_data = status_response.json()
        current_status = status_data["status"]
        progress = status_data.get("progress", 0)

        print(f"Status: {current_status} ({progress}%)")

        if current_status == "completed":
            print("✅ Processing complete!")
            break
        elif current_status == "failed":
            print("❌ Processing failed")
            exit(1)

        time.sleep(10)  # Wait 10 seconds before checking again
    else:
        print(f"❌ Status check failed: {status_response.text}")
        exit(1)

# Step 4: Download cleaned audio
print("\n⬇️ Downloading cleaned audio...")
export_response = requests.get(
    f"{BASE_URL}/uploads/{upload_id}/export",
    headers={**headers, "Accept": "audio/mpeg"}
)

if export_response.status_code == 200:
    with open("cleaned-podcast-episode-1.mp3", "wb") as f:
        f.write(export_response.content)
    print("✅ Download complete!")
    print("🎉 Your cleaned audio is ready!")
else:
    print(f"❌ Download failed: {export_response.text}")
import axios from 'axios';
import FormData from 'form-data';
import fs from 'fs';

// Configuration
const API_KEY = "**your_api_key_here**";
const BASE_URL = "https://api.cleanvoice.ai/v2";
const headers = {"X-API-Key": API_KEY};

async function processAudio() {
    try {
        // Step 1: Verify API key
        console.log("🔑 Verifying API key...");
        const accountResponse = await axios.get(`${BASE_URL}/account`, { headers });
        console.log("✅ API key valid");
        console.log(`Account: ${accountResponse.data.email}`);

        // Step 2: Upload file with options
        console.log("\n📁 Uploading file...");
        const formData = new FormData();
        formData.append('file', fs.createReadStream('podcast-episode-1.mp3'));
        formData.append('name', 'Podcast Episode 1');
        formData.append('remove_filler_words', 'true');
        formData.append('remove_silence', 'true');
        formData.append('enhance_speech', 'true');

        const uploadResponse = await axios.post(
            `${BASE_URL}/uploads`,
            formData,
            { headers: {...headers, ...formData.getHeaders()} }
        );

        const uploadId = uploadResponse.data.id;
        console.log(`✅ Upload successful! ID: ${uploadId}`);

        // Step 3: Monitor processing
        console.log("\n⏳ Processing audio...");
        let status = 'processing';
        while (status !== 'completed' && status !== 'failed') {
            await new Promise(resolve => setTimeout(resolve, 10000)); // Wait 10 seconds

            const statusResponse = await axios.get(
                `${BASE_URL}/uploads/${uploadId}`,
                { headers }
            );

            status = statusResponse.data.status;
            const progress = statusResponse.data.progress || 0;
            console.log(`Status: ${status} (${progress}%)`);
        }

        if (status === 'failed') {
            throw new Error('Processing failed');
        }

        console.log("✅ Processing complete!");

        // Step 4: Download cleaned audio
        console.log("\n⬇️ Downloading cleaned audio...");
        const exportResponse = await axios.get(
            `${BASE_URL}/uploads/${uploadId}/export`,
            {
                headers: {...headers, "Accept": "audio/mpeg"},
                responseType: 'stream'
            }
        );

        const writer = fs.createWriteStream('cleaned-podcast-episode-1.mp3');
        exportResponse.data.pipe(writer);

        await new Promise((resolve, reject) => {
            writer.on('finish', resolve);
            writer.on('error', reject);
        });

        console.log("✅ Download complete!");
        console.log("🎉 Your cleaned audio is ready!");

    } catch (error) {
        console.error("❌ Error:", error.message);
    }
}

processAudio();
This comprehensive tutorial walks you through your first complete Cleanvoice workflow, from upload to download.
What You'll Build
By the end of this tutorial, you'll have:
- ✅ Verified your API access
- ✅ Uploaded an audio file with processing options
- ✅ Monitored the processing progress
- ✅ Downloaded your cleaned audio file
Before You Start
You'll need:
- Your Cleanvoice API key
- An audio file (we'll use podcast-episode-1.mp3 in examples)
- A development environment with curl, Python, or Node.js
Estimated time: 10-15 minutes (plus processing time)
Understanding the Process
The Cleanvoice API follows a simple pattern:
- Upload → Create a new upload with your audio file
- Process → AI automatically cleans your audio
- Monitor → Check progress via status endpoints
- Download → Export your cleaned audio
Step 1: Verify Your Setup
First, let's make sure your API key is working correctly.
Step 2: Upload with Options
Now let's upload an audio file with specific processing options enabled.
Processing Options:
- remove_filler_words: Removes "um", "uh", "like", etc.
- remove_silence: Removes long pauses and dead air
- enhance_speech: Improves audio clarity and quality
Step 3: Monitor Progress
Processing time varies based on: - File length (typically 1-3 minutes per hour of audio) - Processing options selected - Current server load
The status will progress through: uploading → processing → completed
Step 4: Download Your Results
Once processing is complete, you can download your cleaned audio in the same format as the original.
Troubleshooting
Common Issues:
| Problem | Solution |
|---|---|
| Upload fails | Check file size and format |
| Processing stalls | Wait a few minutes, then check status |
| Download fails | Verify the upload completed successfully |
Next Steps
🎉 Great job! You've completed your first end-to-end workflow.
Ready for more? - Advanced Processing Options - Learn about all available options - Batch Processing - Process multiple files efficiently - Export Formats - Download in different formats
Tutorial: Processing Options
Master all the ways to clean your audio
# Basic upload with all options
curl -X POST "https://api.cleanvoice.ai/v2/uploads" \
  -H "X-API-Key: **your_api_key_here**" \
  -F "file=@interview.wav" \
  -F "name=Interview with Sarah" \
  -F "remove_filler_words=true" \
  -F "remove_silence=true" \
  -F "enhance_speech=true" \
  -F "studio_sound=nightly" \
  -F "language=en" \
  -F "filler_words_aggressiveness=medium" \
  -F "silence_threshold=0.5"
import requests

headers = {"X-API-Key": "**your_api_key_here**"}

# Upload with comprehensive options
with open("interview.wav", "rb") as f:
    files = {"file": f}
    data = {
        "name": "Interview with Sarah",
        "remove_filler_words": True,
        "remove_silence": True,
        "enhance_speech": True,
        "studio_sound": "nightly",
        "language": "en",
        "filler_words_aggressiveness": "medium",
        "silence_threshold": 0.5
    }

    response = requests.post(
        "https://api.cleanvoice.ai/v2/uploads",
        headers=headers,
        files=files,
        data=data
    )
const formData = new FormData();
formData.append('file', fs.createReadStream('interview.wav'));
formData.append('name', 'Interview with Sarah');
formData.append('remove_filler_words', 'true');
formData.append('remove_silence', 'true');
formData.append('enhance_speech', 'true');
formData.append('studio_sound', 'nightly');
formData.append('language', 'en');
formData.append('filler_words_aggressiveness', 'medium');
formData.append('silence_threshold', '0.5');

const response = await axios.post(
    'https://api.cleanvoice.ai/v2/uploads',
    formData,
    { headers: {...headers, ...formData.getHeaders()} }
);
Learn how to use all of Cleanvoice's processing options to get the perfect result for your audio content.
Processing Options Overview
Cleanvoice offers several AI-powered processing options that can be combined to achieve the perfect sound for your content:
Core Processing Options
| Option | Description | Best For |
|---|---|---|
remove_filler_words |
Removes "um", "uh", "like", "you know" | Podcasts, interviews, presentations |
remove_silence |
Removes long pauses and dead air | All content types |
enhance_speech |
Improves clarity and reduces background noise | Poor quality recordings |
studio_sound |
Adds professional studio processing (nightly recommended, true deprecated) |
Final production content |
Advanced Controls
| Parameter | Type | Description | Default |
|---|---|---|---|
language |
string | Audio language (affects filler word detection) | auto |
filler_words_aggressiveness |
string | How aggressively to remove fillers: low, medium, high |
medium |
silence_threshold |
float | Minimum silence duration to remove (seconds) | 1.0 |
Choosing the Right Options
For Podcasts
# Recommended podcast settings
curl -X POST "https://api.cleanvoice.ai/v2/uploads" \
  -H "X-API-Key: **your_api_key_here**" \
  -F "file=@podcast.mp3" \
  -F "remove_filler_words=true" \
  -F "remove_silence=true" \
  -F "enhance_speech=true" \
  -F "studio_sound=nightly" \
  -F "filler_words_aggressiveness=medium"
Why these settings: - Remove filler words for professional sound - Remove silence to maintain engagement - Enhance speech for clarity - Studio sound for polished final result
For Interviews
# Recommended interview settings
curl -X POST "https://api.cleanvoice.ai/v2/uploads" \
  -H "X-API-Key: **your_api_key_here**" \
  -F "file=@interview.wav" \
  -F "remove_filler_words=true" \
  -F "remove_silence=true" \
  -F "enhance_speech=true" \
  -F "filler_words_aggressiveness=low" \
  -F "silence_threshold=0.5"
Why these settings: - Light filler word removal to preserve natural conversation - Shorter silence threshold for better flow - Enhance speech for clarity without over-processing
For Presentations
# Recommended presentation settings
curl -X POST "https://api.cleanvoice.ai/v2/uploads" \
  -H "X-API-Key: **your_api_key_here**" \
  -F "file=@presentation.m4a" \
  -F "remove_filler_words=true" \
  -F "remove_silence=true" \
  -F "enhance_speech=true" \
  -F "filler_words_aggressiveness=high" \
  -F "silence_threshold=1.5"
Why these settings: - Aggressive filler word removal for professional delivery - Longer silence threshold to preserve intentional pauses - Full enhancement for conference/webinar quality
Language Support
Cleanvoice supports filler word removal in multiple languages:
| Language | Code | Supported Fillers |
|---|---|---|
| English | en |
um, uh, like, you know, so, actually |
| Spanish | es |
eh, este, pues, bueno |
| French | fr |
euh, ben, donc, en fait |
| German | de |
äh, ähm, also, ja |
| Portuguese | pt |
né, então, assim, tipo |
Fine-Tuning Parameters
Filler Words Aggressiveness
- Low: Removes only obvious, disruptive fillers
- Medium: Balanced removal preserving natural speech
- High: Aggressive removal for professional presentation style
Silence Threshold
Controls the minimum duration of silence to remove:
- 0.3-0.5s: Removes brief pauses (conversational)
- 0.5-1.0s: Standard setting (most content)
- 1.0-2.0s: Preserves intentional pauses (presentations)
Processing Examples
Example 1: Podcast Optimization
# Optimized for podcast publishing
processing_options = {
    "remove_filler_words": True,
    "remove_silence": True,
    "enhance_speech": True,
    "studio_sound": "nightly",
    "filler_words_aggressiveness": "medium",
    "silence_threshold": 0.8,
    "language": "en"
}
Expected results: - 15-25% reduction in file length - Professional studio sound quality - Natural conversational flow maintained
Example 2: Interview Cleanup
# Gentle cleanup for interviews
processing_options = {
    "remove_filler_words": True,
    "remove_silence": True,
    "enhance_speech": True,
    "studio_sound": "false",  # Keep natural sound
    "filler_words_aggressiveness": "low",
    "silence_threshold": 0.5,
    "language": "en"
}
Expected results: - 10-15% reduction in file length - Enhanced clarity while preserving natural conversation - Minimal processing artifacts
Best Practices
Start Conservative
Begin with medium aggressiveness and adjust based on results:
- First upload: Use default settings
- Listen to results: Identify what needs adjustment
- Re-upload: Fine-tune parameters
- Iterate: Perfect your settings
Test with Samples
Use a short sample (1-2 minutes) to test settings before processing long files.
Consider Your Audience
- Professional content: Use more aggressive processing
- Casual content: Preserve natural speech patterns
- Educational content: Balance clarity with authenticity
Troubleshooting Processing Issues
| Issue | Likely Cause | Solution |
|---|---|---|
| Too much removed | Aggressiveness too high | Reduce to low or medium |
| Choppy audio | Silence threshold too low | Increase to 0.8-1.0s |
| Still too many fillers | Language detection wrong | Specify language explicitly |
| Unnatural sound | Over-processing | Disable studio_sound |
Next Steps
- Advanced Techniques - Batch processing and automation
- Export Options - Different output formats and quality settings
- API Reference - Complete parameter documentation
Tutorial: Advanced Techniques
Batch processing, webhooks, and automation
# Batch upload multiple files
for file in *.mp3; do
  curl -X POST "https://api.cleanvoice.ai/v2/uploads" \
    -H "X-API-Key: **your_api_key_here**" \
    -F "file=@$file" \
    -F "name=$file" \
    -F "remove_filler_words=true" \
    -F "remove_silence=true"
done

# Set up webhook for notifications
curl -X POST "https://api.cleanvoice.ai/v2/uploads" \
  -H "X-API-Key: **your_api_key_here**" \
  -F "file=@episode.mp3" \
  -F "webhook_url=https://your-app.com/webhook"
import requests
import asyncio
import aiohttp
from concurrent.futures import ThreadPoolExecutor
import os

class CleanvoiceClient:
    def __init__(self, api_key):
        self.api_key = api_key
        self.base_url = "https://api.cleanvoice.ai/v2"
        self.headers = {"X-API-Key": api_key}

    async def batch_upload(self, file_paths, options=None):
        """Upload multiple files concurrently"""
        async with aiohttp.ClientSession() as session:
            tasks = []
            for file_path in file_paths:
                task = self.upload_file(session, file_path, options)
                tasks.append(task)

            results = await asyncio.gather(*tasks)
            return results

    async def upload_file(self, session, file_path, options=None):
        """Upload a single file"""
        data = aiohttp.FormData()
        data.add_field('file', open(file_path, 'rb'))
        data.add_field('name', os.path.basename(file_path))

        if options:
            for key, value in options.items():
                data.add_field(key, str(value))

        async with session.post(
            f"{self.base_url}/uploads",
            headers=self.headers,
            data=data
        ) as response:
            return await response.json()

# Usage example
client = CleanvoiceClient("**your_api_key_here**")
files = ["episode1.mp3", "episode2.mp3", "episode3.mp3"]
options = {
    "remove_filler_words": True,
    "remove_silence": True,
    "webhook_url": "https://your-app.com/webhook"
}

results = asyncio.run(client.batch_upload(files, options))
print(f"Uploaded {len(results)} files")
import axios from 'axios';
import FormData from 'form-data';
import fs from 'fs';
import path from 'path';

class CleanvoiceClient {
    private apiKey: string;
    private baseUrl: string = 'https://api.cleanvoice.ai/v2';

    constructor(apiKey: string) {
        this.apiKey = apiKey;
    }

    async batchUpload(filePaths: string[], options?: any): Promise<any[]> {
        const uploadPromises = filePaths.map(filePath =>
            this.uploadFile(filePath, options)
        );

        return Promise.all(uploadPromises);
    }

    async uploadFile(filePath: string, options?: any): Promise<any> {
        const formData = new FormData();
        formData.append('file', fs.createReadStream(filePath));
        formData.append('name', path.basename(filePath));

        if (options) {
            Object.entries(options).forEach(([key, value]) => {
                formData.append(key, String(value));
            });
        }

        const response = await axios.post(
            `${this.baseUrl}/uploads`,
            formData,
            {
                headers: {
                    'X-API-Key': this.apiKey,
                    ...formData.getHeaders()
                }
            }
        );

        return response.data;
    }

    async monitorUploads(uploadIds: string[]): Promise<void> {
        const checkStatus = async (id: string) => {
            const response = await axios.get(
                `${this.baseUrl}/uploads/${id}`,
                { headers: { 'X-API-Key': this.apiKey } }
            );
            return response.data;
        };

        while (true) {
            const statuses = await Promise.all(
                uploadIds.map(id => checkStatus(id))
            );

            const completed = statuses.filter(s => s.status === 'completed');
            const failed = statuses.filter(s => s.status === 'failed');
            const processing = statuses.filter(s =>
                s.status === 'processing' || s.status === 'uploading'
            );

            console.log(`✅ ${completed.length} completed, ⏳ ${processing.length} processing, ❌ ${failed.length} failed`);

            if (processing.length === 0) break;

            await new Promise(resolve => setTimeout(resolve, 30000)); // Wait 30 seconds
        }
    }
}

// Usage
const client = new CleanvoiceClient('**your_api_key_here**');
const files = ['episode1.mp3', 'episode2.mp3', 'episode3.mp3'];
const options = {
    remove_filler_words: true,
    remove_silence: true,
    webhook_url: 'https://your-app.com/webhook'
};

const results = await client.batchUpload(files, options);
const uploadIds = results.map(r => r.id);
await client.monitorUploads(uploadIds);
Master advanced Cleanvoice techniques for production workflows, batch processing, and automation.
What You'll Learn
- Batch Processing: Upload and process multiple files efficiently
- Webhooks: Get notified when processing completes
- Automation: Build automated workflows
- Monitoring: Track multiple uploads simultaneously
- Error Handling: Robust error handling strategies
Batch Processing
Why Batch Processing?
- Efficiency: Process multiple files simultaneously
- Time Savings: Parallel uploads reduce total processing time
- Consistency: Apply same settings to multiple files
- Automation: Enable hands-off processing workflows
Batch Upload Strategies
Strategy 1: Sequential Processing
Good for: Small batches, limited bandwidth
def sequential_upload(files):
    results = []
    for file_path in files:
        result = upload_single_file(file_path)
        results.append(result)
    return results
Strategy 2: Concurrent Processing
Good for: Large batches, high bandwidth
async def concurrent_upload(files):
    tasks = [upload_single_file(f) for f in files]
    results = await asyncio.gather(*tasks)
    return results
Strategy 3: Chunked Processing
Good for: Very large batches, rate limiting
def chunked_upload(files, chunk_size=5):
    results = []
    for i in range(0, len(files), chunk_size):
        chunk = files[i:i + chunk_size]
        chunk_results = process_chunk(chunk)
        results.extend(chunk_results)
        time.sleep(1)  # Rate limiting
    return results
Webhooks
Setting Up Webhooks
Webhooks notify your application when processing completes, eliminating the need to poll for status updates.
# Upload with webhook
upload_data = {
    "name": "Episode 1",
    "webhook_url": "https://your-app.com/cleanvoice-webhook",
    "webhook_secret": "your-secret-key"  # Optional for security
}
Webhook Payload
When processing completes, Cleanvoice sends a POST request to your webhook URL:
{
    "event": "upload.completed",
    "upload_id": "12345",
    "status": "completed",
    "name": "Episode 1",
    "duration": 3600,
    "file_size": 52428800,
    "processing_time": 180,
    "timestamp": "2023-11-15T10:30:00Z"
}
Webhook Handler Example
from flask import Flask, request, jsonify
import hmac
import hashlib

app = Flask(__name__)

@app.route('/cleanvoice-webhook', methods=['POST'])
def handle_webhook():
    # Verify webhook signature (optional but recommended)
    signature = request.headers.get('X-Cleanvoice-Signature')
    if not verify_signature(request.data, signature):
        return jsonify({'error': 'Invalid signature'}), 401

    data = request.json
    upload_id = data['upload_id']
    status = data['status']

    if status == 'completed':
        # Download the processed file
        download_processed_file(upload_id)
        # Update your database
        update_upload_status(upload_id, 'completed')
        # Send notification to user
        notify_user(upload_id)

    return jsonify({'status': 'received'}), 200

def verify_signature(payload, signature):
    expected = hmac.new(
        WEBHOOK_SECRET.encode(),
        payload,
        hashlib.sha256
    ).hexdigest()
    return hmac.compare_digest(signature, f"sha256={expected}")
Automation Workflows
Workflow 1: Podcast Publishing Pipeline
class PodcastPipeline:
    def __init__(self, api_key):
        self.client = CleanvoiceClient(api_key)

    async def process_episode(self, raw_file_path, episode_metadata):
        # 1. Upload for processing
        upload_result = await self.client.upload_file(
            raw_file_path,
            {
                "remove_filler_words": True,
                "remove_silence": True,
                "studio_sound": "nightly",
                "webhook_url": f"{WEBHOOK_BASE_URL}/episode-complete"
            }
        )

        # 2. Store upload info
        episode_id = self.store_episode_info(upload_result, episode_metadata)

        # 3. Webhook will handle the rest when processing completes
        return episode_id

    def on_processing_complete(self, upload_id):
        # 4. Download processed audio
        processed_file = self.client.download_export(upload_id)

        # 5. Generate transcription
        transcript = self.generate_transcript(processed_file)

        # 6. Create show notes
        show_notes = self.generate_show_notes(transcript)

        # 7. Upload to hosting platform
        episode_url = self.upload_to_host(processed_file, show_notes)

        # 8. Publish episode
        self.publish_episode(episode_url)
Workflow 2: Batch Interview Processing
async def process_interview_batch(interview_folder):
    # 1. Find all audio files
    audio_files = glob.glob(f"{interview_folder}/*.{mp3,wav,m4a}")

    # 2. Upload all files
    upload_results = await client.batch_upload(
        audio_files,
        {
            "remove_filler_words": True,
            "filler_words_aggressiveness": "low",
            "remove_silence": True,
            "enhance_speech": True
        }
    )

    # 3. Monitor processing
    upload_ids = [r['id'] for r in upload_results]
    await monitor_batch_processing(upload_ids)

    # 4. Download all completed files
    for upload_id in upload_ids:
        download_processed_file(upload_id, f"{interview_folder}/processed/")

    # 5. Generate batch report
    generate_processing_report(upload_results)
Advanced Monitoring
Real-time Progress Tracking
class ProgressTracker:
    def __init__(self, upload_ids):
        self.upload_ids = upload_ids
        self.progress_data = {}

    async def track_progress(self):
        while True:
            updates = await self.get_batch_status()
            self.update_progress(updates)

            if self.all_complete():
                break

            await asyncio.sleep(10)

    def update_progress(self, updates):
        for upload_id, data in updates.items():
            self.progress_data[upload_id] = data
            self.display_progress(upload_id, data)

    def display_progress(self, upload_id, data):
        status = data['status']
        progress = data.get('progress', 0)
        name = data['name']

        print(f"{name}: {status} ({progress}%)")
Error Recovery
class RobustUploader:
    def __init__(self, api_key, max_retries=3):
        self.client = CleanvoiceClient(api_key)
        self.max_retries = max_retries

    async def upload_with_retry(self, file_path, options):
        for attempt in range(self.max_retries):
            try:
                return await self.client.upload_file(file_path, options)
            except Exception as e:
                if attempt == self.max_retries - 1:
                    raise e

                wait_time = 2 ** attempt  # Exponential backoff
                print(f"Attempt {attempt + 1} failed, retrying in {wait_time}s...")
                await asyncio.sleep(wait_time)
Performance Optimization
Rate Limiting
from asyncio import Semaphore

async def rate_limited_uploads(files, max_concurrent=5):
    semaphore = Semaphore(max_concurrent)

    async def upload_with_limit(file_path):
        async with semaphore:
            return await client.upload_file(file_path)

    tasks = [upload_with_limit(f) for f in files]
    return await asyncio.gather(*tasks)
Memory Management
def stream_large_file_upload(file_path):
    # For very large files, use streaming upload
    with open(file_path, 'rb') as f:
        files = {'file': f}
        response = requests.post(
            f"{BASE_URL}/uploads",
            headers=headers,
            files=files,
            stream=True  # Enable streaming
        )
    return response.json()
Production Best Practices
- Always use webhooks for production workflows
- Implement retry logic for network failures
- Monitor rate limits and implement backoff
- Validate files before uploading
- Log all operations for debugging
- Handle partial failures in batch operations
- Use secure webhook signatures
Next Steps
- Export Formats - Advanced export options
- API Reference - Complete API documentation
- Error Handling - Comprehensive error reference
Uploads
To get started, you have to provide a video or audio file.
There are two ways to upload your media:
Option 1: Upload via Public URL
You can directly use publicly available URLs to upload media files to Cleanvoice. This can be a publicly accessible URL hosted by yourselves or a third-party. The files will be automatically downloaded from the URL, so you don't need to explicitly upload them. For example, you can use a URL like "https://yourdomain.com/file.mp3". If you choose to use this option, you can proceed directly to the Edit Section
Option 2: Upload via File
If you choose the option to upload files, you will need to explicitly upload them to Cleanvoice servers. The files will be stored in our R2 European Cloudflare bucket.
After uploading, the API will return a link which you will need for starting a new edit. To upload files to our R2 Cloudflare bucket, you will first need to request a signed URL by using the provided endpoints.
Step 1 - Get a Signed Url
curl -X 'POST' \
  'https://api.cleanvoice.ai/v2/upload?filename=audio.mp3' \
  -H 'X-API-Key: **your_api_key_here**'
import requests
url = 'https://api.cleanvoice.ai/v2/upload?filename=audio.mp3'
headers = {'X-API-Key': '**your_api_key_here**'}
response = requests.post(url, headers=headers)
signed_url = response.json()['signedUrl']require 'net/http'
require 'uri'
require 'json'
uri = URI.parse('https://api.cleanvoice.ai/v2/upload?filename=audio.mp3')
header = { 'X-API-Key': '**your_api_key_here**' }
http = Net::HTTP.new(uri.host, uri.port)
http.use_ssl = true
request = Net::HTTP::Post.new(uri.request_uri, header)
response = http.request(request)
signed_url = JSON.parse(response.body)["signedUrl"]import axios from 'axios';
const url = 'https://api.cleanvoice.ai/v2/upload?filename=audio.mp3';
const headers = {'X-API-Key': '**your_api_key_here**'};
const response = await axios.post(url, {headers});
const signed_url = response.data.signedUrl;{
"signedUrl": "https://f9c8803feb33484a51d0df72dc0fb4a6.eu.r2.cloudflarestorage.com/uploads/uploads/myfile.mp3?response-content-disp..."
}This endpoint returns a signed URL which can be used to make PUT requests to our bucket.
Once the file is uploaded, this same URL should be used as the files URL when creating the associated edit.
HTTP Request
POST https://api.cleanvoice.ai/v2/upload
Parameters
| Parameter | Description |
|---|---|
| filename | (required) The filename and extension of the media file (e.g. my_media.mp3) |
2. Upload your file with the Signed Url
curl -X PUT -T my_media.mp3 -L "https://signed-url..."import requests
url = "https://signed-url..."
file = open("my_media.mp3", "rb")
requests.put(url, data=file)import axios from 'axios';
const url = "https://signed-url...";
const file = new File(["my_media.mp3"], "my_media.mp3", {
type: "audio/mp3"
});
axios.put(url, file)
.then(response => {
console.log(response.status);
})
.catch(error => {
console.log(error);
});require 'uri'
require 'net/http'
signed_url = "https://signed-url..."
uri = URI(signed_url)
req = Net::HTTP::Put.new(uri)
req.body = File.read("my_media.mp3")
res = Net::HTTP.start(uri.hostname, uri.port) do |http|
http.request(req)
endSimple upload to an S3 Bucket
Once you have a signed URL, you have to upload the file there, and you do it as you would with any S3 bucket.
To upload a file to the signed URL you may use cURL like the example on the right.
Note: You can upload, but not download the file with this URL. The purpose is to upload the file for us to edit it.
Edits
Create a Edit
curl -X POST "https://api.cleanvoice.ai/v2/edits" \
  -H "X-API-Key: **your_api_key_here**" \
  -H "Content-Type: application/json" \
  -d '{
  "input": {
    "files": [
      "https://public.com/file.mp3"
    ],
    "config": {}
  }
}'
import requests
import json

file_url = "https://public.com/file.mp3_OR_Signed_URL"
api_key = "**your_api_key_here**"

data = {
    "input": {
        "files": [file_url],
        "config": {}
    }
}
headers = {
    "X-API-Key": api_key,
    "Content-Type": "application/json"
}

response = requests.post("https://api.cleanvoice.ai/v2/edits", json=data, headers=headers)
print(response.json())
import axios from 'axios';

const fileUrl = "https://public.com/file.mp3_OR_Signed_URL";
const apiKey = "**your_api_key_here**";

const data = {
    input: {
        files: [fileUrl],
        config: {}
    }
};
const headers = {
    "X-API-Key": apiKey,
    "Content-Type": "application/json"
};

axios.post("https://api.cleanvoice.ai/v2/edits", data, { headers })
    .then((response) => {
        console.log(response.data);
    })
    .catch((error) => {
        console.log(error);
    });
require 'net/http'
require 'json'

file_url = "https://public.com/file.mp3_OR_Signed_URL"
api_key = "**your_api_key_here**"

data = {
    input: {
        files: [file_url],
        config: {}
    }
}.to_json
headers = {
    "X-API-Key" => api_key,
    "Content-Type" => "application/json"
}

uri = URI("https://api.cleanvoice.ai/v2/edits")

response = Net::HTTP.post(uri, data, headers)
puts JSON.parse(response.body)
The above command returns JSON structured like this:
{
  "id": "9a14b8fe-3604-43e4-8c06-06a7491ae8fc"
}
This endpoint creates a new edit. After a edit is created, the system will proceed to automatically editing it. You can check if the editing process has finished by retrieving a edit.
We strongly checking out the API Playground to see all the possible configurations and how they affect the audio. https://app.cleanvoice.ai/playground/
Cleanvoice requires a public link to edit your audio, if this is not possible go back to the upload section. If you have already uploaded your audio via our api, you can use the signed URL instead.
Note all uploads and edits are stored for 7 days only. If you require longer storage, write us.
The API can edit multi-track audio as well. Multi-track uploads are where every audio file contains a different speaker. To use it, just pass multiple files. Single-Track are where all the speakers are merged into a single file.
HTTP Request
POST https://api.cleanvoice.ai/v2/edits
Parameters
Input
| Parameter | Type | Description |
|---|---|---|
| files | Array | (required) A list of URL-Strings containing Audio. For Single-Track, a single link is located in the array. Else Cleanvoice assumes it's a multi-track audio recording |
Config
| Parameter | Type | Description |
|---|---|---|
| video | Boolean | If true, indicates that the input is a video file. This will process the audio track of the video. Default: False. |
| send_email | Boolean | Send an email to your account with the edited file(s). Default: False. |
| long_silences | Boolean | Identify and remove long silences. Default: False. |
| stutters | Boolean | Identify and remove stutters. Default: False. |
| fillers | Boolean | Identify and remove filler sounds. Default: False. |
| mouth_sounds | Boolean | Identify and remove mouth sounds. Default: False. |
| hesitations | Boolean | Identify and remove hesitations. Default: False. |
| muted | Boolean | Mute specified segments instead of cutting them. Default: False. |
| remove_noise | Boolean | Remove background noise. Can also avoid removing music if keep_music is true, making edits less aggressive in sections with music. Default: True. |
| keep_music | Boolean | Avoids removing or editing sections with music to preserve the musical background. Default: False. |
| breath | String Boolean | Control breathing sounds. Allowed values: true (same as "muted"), false (no change), "natural" (reduce breath volume, keep natural presence), true (fully mute breaths), "legacy" (older algorithm; recommended when input audio quality is already good). Default: False. |
| normalize | Boolean | Normalize audio levels for consistent loudness. Advised to be true if merge is used. Default: False. |
| autoeq (Legacy) | Boolean | Apply automatic EQ adjustments. Sound Studio will replace it. Default: False. |
| studio_sound | String | Apply studio processing: false, true (deprecated), nightly (recommended). Default: false. |
| export_format | String | The format to export the edited audio in. Supports "auto", "mp3", "wav", "flac", "m4a". Default: "auto". |
| transcription | Boolean | Transcribe the audio to text. Default: False. |
| summarize | Boolean | Provide a summary of the audio content. Requires transcription to be true. Default: False. |
| social_content | Boolean | Indicates the need for content to be optimized for social media sharing. Requires summarize to be true. Default: False. |
| export_timestamps | Boolean | Export timestamps of edits. Default: False. |
| signed_url | String | A user-provided S3 link where the results are uploaded via a PUT request. Default: Null (if not used). |
| merge | Boolean | Mix multi-track files into one. Recommended to use with normalize=true for best results. Default: False. |
Choosing the Right Settings
Common presets to help you pick the right configuration
Use when you want a polished result with intelligent enhancement.
{
  "config": {
    "remove_noise": true,
    "normalize": true,
    "studio_sound": "nightly"
  }
}
Use when you only want basic background noise reduction.
{
  "config": {
    "remove_noise": true,
    "normalize": true
  }
}
Use for comprehensive cleanup suitable for production.
{
  "config": {
    "fillers": true,
    "long_silences": true,
    "stutters": true,
    "mouth_sounds": true,
    "hesitations": true,
    "remove_noise": true,
    "normalize": true,
    "studio_sound": "nightly"
  }
}
Generate transcript and summary without altering audio.
{
  "config": {
    "transcription": true,
    "summarize": true
  }
}
Retrieve a Edit
curl "https://api.cleanvoice.ai/v2/edits/<ID>" \
  -H "X-Api-Key: **your_api_key_here**"
import requests

url = "https://api.cleanvoice.ai/v2/edits/<ID>"
headers = {
    "X-Api-Key": "**your_api_key_here**"
}

response = requests.get(url, headers=headers)
print(response.json())
import axios from 'axios';

const url = "https://api.cleanvoice.ai/v2/edits/<ID>";
const headers = {
    "X-Api-Key": "**your_api_key_here**"
};

axios.get(url, { headers })
    .then((response) => {
        console.log(response.data);
    })
    .catch((error) => {
        console.log(error);
    });
require 'net/http'
require 'json'

url = "https://api.cleanvoice.ai/v2/edits/<ID>"
headers = {
    "X-Api-Key" => "**your_api_key_here**"
}
uri = URI(url)

response = Net::HTTP.get_response(uri, headers)
puts JSON.parse(response.body)
The above command returns JSON structured like this:
{
  "status": "SUCCESS",
  "result": {
    "video": false,
    "filename": "98d88d834dca4d61a1cadd1d42d9fcd4",
    "statistics": {
      "BREATH": 340,
      "DEADAIR": 124,
      "STUTTERING": 2,
      "MOUTH_SOUND": 5,
      "FILLER_SOUND": 17
    },
    "download_url": "https://fra1.digitaloceanspaces.com/cleanvoice/uploads/b309cb56-0ae7-4...",
    "summarization": {
      "title": "Combating Poaching with AI: Protecting Endangered Wildlife",
      "summary": "In this episode of the Weird AI...",
      "chapters": [
        {
          "start": 0,
          "title": "AI Combats Poaching to Save Elephants"
        },
        {
          "start": 230.65,
          "title": "Tracking Wildlife with Motion-Activated Cameras"
        },...
              ],
      "summaries": [
        "In this episode ...",
        "The speakers discuss..",
       ...
              ],
      "key_learnings": "...",
      "summary_of_summary": "...",
      "episode_description": "..."
    },
    "transcription": {
      "paragraphs": [
        {
          "end": 5.84,
          "text": " This episode has been recorded two weeks before the war in Ukraine last year.",
          "start": 0
        },
     ing which deals with probability a lot",
          "start": 667.2
        },..

      ],
      "transcription": {
        "words": [
          {
            "id": 0,
            "end": 0.365,
            "text": "This",
            "start": 0
          },
          {
            "id": 1,
            "end": 1.00375,
            "text": "episode",
            "start": 0.365
          },..        ],
        "paragraphs": [
          {
            "id": 0,
            "end": 9.872665534804755,
            "start": 0.7385398981324278,
            "speaker": "SPEAKER_01"
          },..
                  ]
      }
    },
    "social_content": [..,
    "merged_audio_url": [...],
    "timestamps_markers_urls": [...]
  },
  "task_id": "b309cb56-0ae7-477d-8fcc-15052bb297e4"
}
This endpoint retrieves information about a specific edit. The results can be used in two ways.
- Retrieve the edited audio by downloading the download_url
- Edit your audio yourself and use the edits as references.
HTTP Request
GET https://api.cleanvoice.ai/v2/edits/<ID>
Edits State Descriptions
| Value | Description |
|---|---|
PENDING |
Waiting for execution or unknown edit ID |
STARTED |
Edit has been started |
SUCCESS |
Audio has been successfully edited |
RETRY |
Task is being retried |
FAILURE |
File failed to process |
Exports
Create an Export
curl -X POST "https://www.happyscribe.com/api/v1/exports" \
  -H "Authorization: Bearer **your_api_key_here**" \
  -H 'Content-Type: application/json' \
  -d '{
    "export": {
      "format": "txt",
      "transcription_ids": [
        "**transcription_id_1**"
      ]
    }
  }'
fetch('https://www.happyscribe.com/api/v1/exports', {
  method: 'POST',
  headers: {
    authorization: 'Bearer **your_api_key_here**',
    'content-type': 'application/json',
  },
  body: JSON.stringify({
    export: {
      format: 'txt',
      transcription_ids:
      [
        '**transcription_id_1**'
      ]
    }
  })
})
The above command returns JSON structured like this:
{
   "id":"**export_id**",
   "state":"pending",
   "format":"txt",
   "show_timestamps":false,
   "show_speakers":false,
   "show_comments":false,
   "show_highlights":false,
   "transcription_ids":[
      "**transcription_id_1**"
   ]
}
This endpoint creates a new export. After an export is created, the system will proceed to generate it. You can watch if the exporting process has finished by retrieving an export.
The exporting process is generally very fast. Each file takes ~10s to complete. You can submit more than one file at the same time.
HTTP Request
POST https://www.happyscribe.com/api/v1/exports
JSON Parameters
| Parameter | Default | Description |
|---|---|---|
| format | none | (required) Specify the export format (see chart below) |
| show_timestamps | false | Include timestamps (only formats: txt, docx, pdf ) |
| show_speakers | false | Include speaker labels (only formats: txt, docx, pdf ) |
| show_comments | false | Include comments (only formats: txt, docx, pdf ) |
| show_highlights | false | Include highlights (only formats: docx, pdf ) |
Export formats
| Value | Description |
|---|---|
| txt | Text Document (.txt) |
| docx | Word Document (.docx) |
| PDF Document (.pdf) | |
| srt | Subtitles (SubRip .srt) |
| vtt | Subtitles (WebVTT .vtt) |
| stl | Subtitles (EBU-STL .stl) |
| avid | Avid Markers (.txt) |
| html | Interactive Transcript (.html) |
| premiere | Premiere Pro (Beta) (.xml) |
| maxqda | Maxqda (.txt) |
| json | JSON (.json) |
| fcp | Final Cut Pro (.fcp) |
Retrieve an Export
curl "https://www.happyscribe.com/api/v1/exports/<ID>" \
  -H "Authorization: Bearer **your_api_key_here**"
fetch('https://www.happyscribe.com/api/v1/exports/<ID>', {
  headers: {
    authorization: 'Bearer **your_api_key_here**'
  }
})
The above command returns JSON structured like this:
{
   "id":"**export_id**",
   "state":"ready",
   "format":"txt",
   "show_timestamps":false,
   "show_speakers":false,
   "show_comments":false,
   "show_highlights":false,
   "transcription_ids":[
      "**transcription_id_1**",
   ],
   "download_link":"**download_link**"
}
This endpoint retrieves information about a specific export. To download it you can use the returned download_link .
HTTP Request
GET https://www.happyscribe.com/api/v1/exports/<ID>
Export State Descriptions
| Value | Description |
|---|---|
pending |
Waiting to be processed |
processing |
The export is being generated |
ready |
The export is ready to download |
expired |
No longer available |
failed |
A problem occurred |
Languages
We support the following languages:
| Code | Language | Support |
|---|---|---|
EN |
English | Full |
DE |
German | Full |
RO |
Romanian | Full |
FR |
French | Partial |
NL |
Dutch | Partial |
BG |
Bulgarian (Bulgaria) | Partial |
AR |
Arabic (United Arab Emirates) | Partial |
tr-TR |
Turkish (Turkey) | Partial |
PL |
Polish | Partial |
IT |
Italian | Partial |
ES |
Spanish | Partial |
PT |
Portuguese | Partial |
Note that, we don't work on the word level. We work on the phonetical level, therefore if theres a language which is similar to two languages which we have listed, it could work as well. Say German and English are supported, then Dutch should work as well.
Delete Files
We delete all uploads (raw files & edited files) 7 days after being processed. However if you want to delete them sooner, you can send a delete request.
curl -X 'DELETE' \
  'https://api.cleanvoice.ai/v2/edits/<job_id>' \
  -H 'X-API-Key: **your_api_key_here**'
import requests

url = 'https://api.cleanvoice.ai/v2/edits/<job_id>'
headers = {'X-API-Key': '**your_api_key_here**'}
response = requests.delete(url, headers=headers)
require 'net/http'
require 'uri'
require 'json'

uri = URI.parse('https://api.cleanvoice.ai/edits/<job_id>')
header = { 'X-API-Key': '**your_api_key_here**' }

http = Net::HTTP.new(uri.host, uri.port)
http.use_ssl = true

request = Net::HTTP::Delete.new(uri.request_uri, header)
response = http.request(request)
import axios from 'axios';

const url = 'https://api.cleanvoice.ai/edits/<job_id>';
const headers = {'X-API-Key': '**your_api_key_here**'};
const response = await axios.delete(url, {headers});
API Reference
Complete endpoint documentation
The Cleanvoice API is organized around REST principles. All requests should be made over HTTPS. All responses are returned in JSON format.
Base URL
https://api.cleanvoice.ai/v2
Authentication
All API requests require authentication using an API key in the X-API-Key header:
curl "https://api.cleanvoice.ai/v2/account" \
  -H "X-API-Key: **your_api_key_here**"
Rate Limits
| Plan | Requests/Hour | Concurrent Uploads |
|---|---|---|
| Free | 100 | 2 |
| Pro | 1,000 | 10 |
| Enterprise | 10,000 | 50 |
Rate limit headers are included in all responses:
- X-RateLimit-Limit: Request limit per hour
- X-RateLimit-Remaining: Requests remaining in current window
- X-RateLimit-Reset: Time when limit resets (Unix timestamp)
Uploads
Create Upload
Upload an audio file for processing.
curl -X POST "https://api.cleanvoice.ai/v2/uploads" \
  -H "X-API-Key: **your_api_key_here**" \
  -F "file=@audio.mp3" \
  -F "name=My Upload" \
  -F "remove_filler_words=true"
import requests

files = {"file": open("audio.mp3", "rb")}
data = {
    "name": "My Upload",
    "remove_filler_words": True,
    "remove_silence": True
}
headers = {"X-API-Key": "**your_api_key_here**"}

response = requests.post(
    "https://api.cleanvoice.ai/v2/uploads",
    files=files,
    data=data,
    headers=headers
)
HTTP Request: POST /uploads
Parameters:
| Parameter | Type | Required | Description |
|---|---|---|---|
file |
file | yes | Media file. Audio: MP3, WAV, M4A/AAC, FLAC, OGG/Opus. Video: MP4, MOV, MKV, WebM. |
name |
string | yes | Human-readable name for the upload |
remove_filler_words |
boolean | no | Remove filler words (default: false) |
remove_silence |
boolean | no | Remove silence (default: false) |
enhance_speech |
boolean | no | Enhance speech quality (default: false) |
studio_sound |
string | no | Apply studio processing: false, true (deprecated), nightly (recommended) |
language |
string | no | Language code (default: auto) |
filler_words_aggressiveness |
string | no | low, medium, high (default: medium) |
silence_threshold |
float | no | Minimum silence duration in seconds (default: 1.0) |
webhook_url |
string | no | URL to receive completion notification |
Response:
{
    "id": "upload_12345",
    "name": "My Upload",
    "status": "uploading",
    "progress": 0,
    "created_at": "2023-11-15T10:30:00Z",
    "file_size": 52428800,
    "duration": null,
    "processing_options": {
        "remove_filler_words": true,
        "remove_silence": true,
        "enhance_speech": false,
        "studio_sound": "nightly",
        "language": "auto"
    }
}
Get Upload
Retrieve information about a specific upload.
curl "https://api.cleanvoice.ai/v2/uploads/upload_12345" \
  -H "X-API-Key: **your_api_key_here**"
HTTP Request: GET /uploads/{id}
Response:
{
    "id": "upload_12345",
    "name": "My Upload",
    "status": "completed",
    "progress": 100,
    "created_at": "2023-11-15T10:30:00Z",
    "completed_at": "2023-11-15T10:33:45Z",
    "file_size": 52428800,
    "duration": 3600,
    "processed_duration": 2880,
    "reduction_percentage": 20,
    "processing_options": {
        "remove_filler_words": true,
        "remove_silence": true,
        "enhance_speech": false,
        "studio_sound": "nightly",
        "language": "en"
    },
    "processing_stats": {
        "filler_words_removed": 142,
        "silence_removed_seconds": 720,
        "processing_time": 225
    }
}
Status Values:
| Status | Description |
|---|---|
uploading |
File is being uploaded |
queued |
Upload queued for processing |
processing |
AI is processing the audio |
completed |
Processing finished successfully |
failed |
Processing failed |
List Uploads
Retrieve a list of your uploads.
curl "https://api.cleanvoice.ai/v2/uploads?limit=10&offset=0" \
  -H "X-API-Key: **your_api_key_here**"
HTTP Request: GET /uploads
Query Parameters:
| Parameter | Type | Description |
|---|---|---|
limit |
integer | Number of results (1-100, default: 20) |
offset |
integer | Pagination offset (default: 0) |
status |
string | Filter by status |
created_after |
datetime | Filter by creation date |
Response:
{
    "uploads": [
        {
            "id": "upload_12345",
            "name": "My Upload",
            "status": "completed",
            "created_at": "2023-11-15T10:30:00Z",
            "duration": 3600,
            "file_size": 52428800
        }
    ],
    "pagination": {
        "limit": 10,
        "offset": 0,
        "total": 25,
        "has_more": true
    }
}
Delete Upload
Delete an upload and its processed files.
curl -X DELETE "https://api.cleanvoice.ai/v2/uploads/upload_12345" \
  -H "X-API-Key: **your_api_key_here**"
HTTP Request: DELETE /uploads/{id}
Response: 204 No Content
Exports
Download Export
Download the processed audio file.
curl "https://api.cleanvoice.ai/v2/uploads/upload_12345/export" \
  -H "X-API-Key: **your_api_key_here**" \
  -H "Accept: audio/mpeg" \
  -o "processed.mp3"
HTTP Request: GET /uploads/{id}/export
Headers:
| Header | Description | Example |
|---|---|---|
Accept |
Desired format | audio/mpeg, audio/wav, audio/mp4, audio/flac |
Query Parameters:
| Parameter | Type | Description |
|---|---|---|
quality |
string | Output quality: low, medium, high, lossless |
Response: Binary audio data
Export Information
Get metadata about the export.
curl "https://api.cleanvoice.ai/v2/uploads/upload_12345/export/info" \
  -H "X-API-Key: **your_api_key_here**"
HTTP Request: GET /uploads/{id}/export/info
Response:
{
    "upload_id": "upload_12345",
    "original_duration": 3600,
    "processed_duration": 2880,
    "reduction_percentage": 20,
    "file_size": 41943040,
    "format": "mp3",
    "quality": "medium",
    "bitrate": "192kbps",
    "sample_rate": "44100Hz",
    "channels": 2,
    "processing_applied": [
        "remove_filler_words",
        "remove_silence",
        "enhance_speech"
    ],
    "available_formats": [
        "audio/mpeg",
        "audio/wav",
        "audio/mp4"
    ]
}
Account
Get Account Info
Retrieve information about your account.
curl "https://api.cleanvoice.ai/v2/account" \
  -H "X-API-Key: **your_api_key_here**"
HTTP Request: GET /account
Response:
{
    "id": "user_12345",
    "email": "user@example.com",
    "plan": "pro",
    "usage": {
        "hours_processed_this_month": 25.5,
        "uploads_this_month": 42,
        "hours_remaining": 74.5
    },
    "limits": {
        "max_file_size": 2147483648,
        "max_duration": 14400,
        "concurrent_uploads": 10,
        "requests_per_hour": 1000
    },
    "created_at": "2023-08-15T09:15:00Z"
}
Usage Statistics
Get detailed usage statistics.
curl "https://api.cleanvoice.ai/v2/account/usage?period=month" \
  -H "X-API-Key: **your_api_key_here**"
HTTP Request: GET /account/usage
Query Parameters:
| Parameter | Type | Description |
|---|---|---|
period |
string | week, month, year (default: month) |
start_date |
date | Custom period start (YYYY-MM-DD) |
end_date |
date | Custom period end (YYYY-MM-DD) |
Response:
{
    "period": "month",
    "start_date": "2023-11-01",
    "end_date": "2023-11-30",
    "usage": {
        "total_uploads": 42,
        "hours_processed": 25.5,
        "total_file_size": 1073741824,
        "successful_uploads": 40,
        "failed_uploads": 2,
        "processing_time_saved": 5.1
    },
    "daily_breakdown": [
        {
            "date": "2023-11-01",
            "uploads": 3,
            "hours_processed": 2.1
        }
    ]
}
Webhooks
Configure webhooks to receive notifications when processing completes.
Webhook Events
| Event | Description |
|---|---|
upload.completed |
Processing finished successfully |
upload.failed |
Processing failed |
upload.started |
Processing started |
Webhook Payload
{
    "event": "upload.completed",
    "upload_id": "upload_12345",
    "status": "completed",
    "name": "My Upload",
    "duration": 3600,
    "processed_duration": 2880,
    "file_size": 52428800,
    "processing_time": 180,
    "timestamp": "2023-11-15T10:33:45Z",
    "processing_stats": {
        "filler_words_removed": 142,
        "silence_removed_seconds": 720
    }
}
Webhook Security
Verify webhook authenticity using the X-Cleanvoice-Signature header:
import hmac
import hashlib

def verify_webhook(payload, signature, secret):
    expected = hmac.new(
        secret.encode(),
        payload,
        hashlib.sha256
    ).hexdigest()

    return hmac.compare_digest(signature, f"sha256={expected}")
Error Handling
HTTP Status Codes
| Code | Description |
|---|---|
| 200 | Success |
| 201 | Created |
| 204 | No Content |
| 400 | Bad Request |
| 401 | Unauthorized |
| 403 | Forbidden |
| 404 | Not Found |
| 413 | File Too Large |
| 422 | Unprocessable Entity |
| 429 | Too Many Requests |
| 500 | Internal Server Error |
Error Response Format
{
    "error": {
        "code": "INVALID_FILE_FORMAT",
        "message": "File format not supported. Please use MP3, WAV, M4A, or FLAC.",
        "details": {
            "supported_formats": ["mp3", "wav", "m4a", "flac"],
            "received_format": "avi"
        }
    }
}
Common Error Codes
| Code | Description |
|---|---|
INVALID_API_KEY |
API key is missing or invalid |
INVALID_FILE_FORMAT |
File format not supported |
FILE_TOO_LARGE |
File exceeds size limit |
DURATION_TOO_LONG |
Audio duration exceeds limit |
RATE_LIMIT_EXCEEDED |
Too many requests |
INSUFFICIENT_CREDITS |
Not enough credits for processing |
UPLOAD_NOT_FOUND |
Upload ID does not exist |
PROCESSING_FAILED |
Audio processing failed |
SDKs and Libraries
Official SDKs are available for popular programming languages:
- Python: cleanvoice-python —
pip install cleanvoice-sdk - Node.js: cleanvoice-js —
npm install @cleanvoice/cleanvoice-sdk - Ruby:
gem install cleanvoice-ruby - PHP:
composer require cleanvoice/cleanvoice-php
OpenAPI Specification
Download the complete OpenAPI 3.0 specification: - JSON Format - YAML Format
Errors
The Cleanvoice API uses the following error codes:
| Error Code | Meaning |
|---|---|
| 400 | Bad Request -- Your request is invalid. |
| 401 | Unauthorized -- Your API key is wrong or you don't have permission to access that resource. |
| 403 | Forbidden -- The resource requested is hidden for administrators only. |
| 404 | Not Found -- The specified resource could not be found. |
| 405 | Method Not Allowed -- You tried to access a resource with an invalid method. |
| 406 | Not Acceptable -- You requested a format that isn't json. |
| 410 | Gone -- The resource requested has been removed from our servers. |
| 418 | I'm a teapot. |
| 422 | Unprocessable Entity -- There was an error processing your request. |
| 429 | Too Many Requests -- You're requesting too many resources! Slow down! |
| 500 | Internal Server Error -- We had a problem with our server. Try again later. |
| 503 | Service Unavailable -- We're temporarily offline for maintenance. Please try again later. |
Supported File Formats
Cleanvoice supports all major audio formats and common video formats.
Audio Formats
- MP3 (
.mp3) - WAV (
.wav) - M4A / AAC (
.m4a,.aac) - FLAC (
.flac) - OGG / Opus (
.ogg,.opus)
Video Formats
- MP4 (
.mp4) - MOV (
.mov) - MKV (
.mkv) - WebM (
.webm)